Photographing sculptures presents unique challenges compared to two-dimensional art. The goal extends beyond mere documentation; effective sculpture photography translates a three-dimensional object's form, texture, and scale into a compelling two-dimensional image that accurately represents the artwork. For artists, galleries, and collectors, high-quality imagery directly impacts sales, exhibition opportunities, and archival integrity. A poorly lit or composed photograph can flatten intricate details, distort proportions, or misrepresent material finishes, diminishing the perceived value and artistic intent of the piece. This guide focuses on technical and compositional strategies to capture sculptures with commercial and artistic fidelity.
Establishing Your Photographic Objective and Environment
Before setting up equipment, define the primary purpose of your photographs. This dictates approach and necessary compromises.
- Commercial Sales/Exhibition Catalogs: Requires consistent lighting, accurate color rendition, and multiple angles to convey the entire form. Focus on clarity, detail, and a neutral background.
- Artistic Portfolio/Documentation: May allow for more dramatic lighting or contextual elements, but still prioritizes faithful representation of the artwork.
- Archival/Insurance: Demands precise scale, color accuracy, and comprehensive coverage of all surfaces, often requiring a standardized setup.
Consider the sculpture itself: its material (e.g., highly reflective bronze, matte ceramic, translucent glass), size, and whether it's intended for indoor or outdoor display. These factors influence lighting choices, background management, and lens selection.
Managing Light to Define Form and Texture
Light is the primary tool for revealing a sculpture's three-dimensionality. Flat, frontal lighting will flatten the form, while overly dramatic lighting can obscure details. The aim is to create subtle shadows that define contours without harsh contrasts.
- Directional Lighting: Position light sources to graze the sculpture's surface. This emphasizes texture and creates modeling shadows that highlight depth. Side lighting (45-60 degrees from the camera axis) is often effective for this purpose.
- Multiple Light Sources:
- Key Light: The main light source, typically positioned to one side and slightly above the sculpture.
- Fill Light: A secondary, less intense light source or reflector used to soften shadows created by the key light, preventing areas from becoming completely black. Position it opposite the key light or near the camera.
- Backlight/Rim Light: A light placed behind and slightly to the side of the sculpture can create a subtle glow along its edges, separating it from the background and enhancing its form, particularly for darker pieces.
- Light Modifiers: Softboxes, umbrellas, and diffusers spread and soften light, reducing harsh shadows and specular highlights, especially crucial for reflective materials. Grids can be added to softboxes to control light spill and direct it more precisely.
- Reflectors: Silver, gold, or white reflectors bounce ambient or primary light back onto the sculpture, filling shadows naturally. White foam core boards are inexpensive and effective.
Pro Tip: For consistent color temperature and accurate white balance, especially when using artificial lighting, always include a neutral gray card in your initial test shots. This provides a reference point for post-processing adjustments, ensuring true-to-life colors that are critical for commercial presentation.
Composition and Perspective for Visual Impact
The way a sculpture is framed and the perspective from which it's shot significantly impact how it's perceived. Avoid generic, straight-on shots that lack dynamism.
Choosing Your Angle and Background
- Eye-Level Perspective: Often a good starting point, as it presents the sculpture as a viewer would typically experience it.
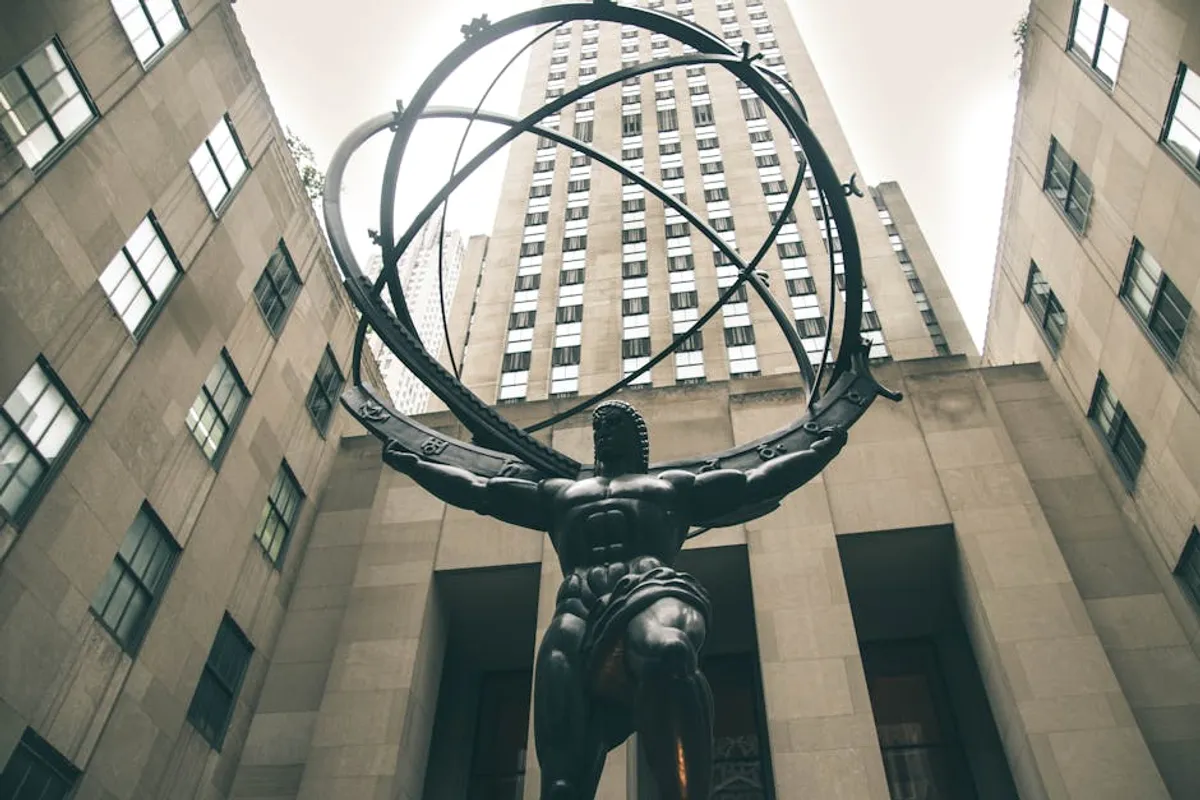
- Lower Angles: Can make a sculpture appear monumental or imposing, emphasizing verticality.
- Higher Angles: Useful for revealing top surfaces or intricate details on the upper portions of a piece.
- Background Simplicity: A clean, uncluttered background ensures the sculpture remains the undisputed focal point. Seamless paper backdrops (white, gray, or black) are standard for commercial work. If shooting in situ, use a wide aperture to blur distracting elements.
- Contextual Shots: For some purposes, including the environment can be beneficial, but ensure the context enhances rather than detracts from the sculpture. Consider scale objects if the sculpture's size isn't immediately apparent.
Essential Camera Settings and Equipment
While high-end gear can offer advantages, understanding fundamental photographic principles is more critical than specific brands.
Camera and Lens Selection
- Camera Type: DSLR or mirrorless cameras offer manual control over settings, interchangeable lenses, and larger sensors for better image quality. Advanced smartphones with manual controls can be used for smaller, less demanding projects, but limitations exist.
- Lenses:
- Prime Lenses (e.g., 50mm, 85mm): Often sharper than zoom lenses and excellent for detail.
- Macro Lenses: Indispensable for capturing intricate details on smaller sculptures or specific textures.
- Telephoto Lenses (70-200mm): Useful for creating a compressed perspective, which can be flattering for certain forms, and for blurring backgrounds effectively. Avoid wide-angle lenses for full sculpture shots as they can introduce distortion.
Key Camera Settings
- Aperture (f-stop): Control depth of field. For full sculpture shots, an aperture like f/8 to f/16 ensures the entire piece is in sharp focus. For detail shots where you want to isolate a specific area, a wider aperture (e.g., f/4) can be effective.
- ISO: Keep ISO as low as possible (e.g., ISO 100 or 200) to minimize digital noise and maximize image quality.
- Shutter Speed: With a tripod, shutter speed is less critical, as long as it's fast enough to prevent blur from ambient movement (if any) or camera shake. Aim for a speed that allows for proper exposure with your chosen aperture and ISO.
- White Balance: Set manually to match your light source (e.g., "Daylight" for natural light, "Tungsten" for incandescent bulbs, or use a custom white balance with a gray card). Shooting in RAW format provides the most flexibility for adjusting white balance in post-processing.
Stabilization and Accessories
- Tripod: Absolutely essential for sharp images, especially at lower ISOs and smaller apertures. It also allows for consistent framing across multiple shots.
- Remote Shutter Release: Prevents camera shake from pressing the shutter button.
- Reflectors/Diffusers: Inexpensive tools for light shaping and shadow control.
Post-Processing for Professional Presentation
Post-processing is not about altering the sculpture's appearance but enhancing the photograph's accuracy and visual appeal. It corrects imperfections and optimizes the image for its intended use.
- Color Correction and White Balance: Fine-tune colors to match the original artwork. Use the gray card reference if available.
- Exposure and Contrast Adjustment: Balance highlights and shadows to reveal detail across the entire sculpture. Avoid crushing blacks or blowing out whites.
- Sharpening: Apply subtle sharpening to enhance details, being careful not to introduce artifacts.
- Cropping and Straightening: Ensure the sculpture is perfectly aligned and framed, removing any distracting edges or unnecessary background space.
- Background Cleanup: Remove dust, blemishes, or stray hairs from seamless backdrops. For complex backgrounds, careful masking and removal may be necessary.
Optimizing Your Visual Asset Library
Professional sculpture photography is an investment that pays dividends in presentation and perceived value. By meticulously managing lighting, composition, and technical settings, you create visual assets that faithfully represent the artwork. These images become critical tools for sales, exhibitions, and comprehensive documentation, directly supporting the commercial and artistic goals associated with the sculpture.
Frequently Asked Questions
What is the best lighting setup for a sculpture?
The "best" setup often involves two to three lights: a key light positioned to one side (e.g., 45 degrees), a less intense fill light or reflector on the opposite side to soften shadows, and potentially a subtle backlight to separate the sculpture from the background. This creates depth and reveals form without harshness.
How do I photograph highly reflective sculptures without glare?
Use large, diffused light sources (softboxes, umbrellas) to create soft, even reflections. Position lights carefully to avoid direct hot spots. Polarizing filters on your lens can also help reduce glare, especially from flat, reflective surfaces, but they may slightly alter color and require more light.
Should I use a white or black background?
A white background is versatile and often preferred for commercial listings as it makes the sculpture stand out cleanly. A black background can create a dramatic mood and emphasize light forms, but can also make a sculpture appear heavier. A neutral gray background is often a good compromise, providing separation without stark contrast.
What lens is best for sculpture photography?
A prime lens in the 50mm to 100mm range (on a full-frame camera) or a short telephoto zoom (e.g., 70-200mm) is generally recommended. These lenses minimize distortion compared to wide-angle lenses and allow you to work at a comfortable distance, creating a natural perspective. A macro lens is essential for detailed close-ups.